Synchronizing via the Google Dataplex Universal Catalog integration is the process of integrating metadata from the Google Dataplex projects and making the data available in Collibra Platform.
You can either synchronize manually or automate the process by adding a synchronization schedule.
Tip
Prerequisites
In your Collibra environment
- Make sure you are on the latest UI because the Dataplex Universal Catalog integration is only available in the latest UI.
- You have created a GCP connection.
- You have added the Dataplex Universal Catalog capability to the GCP connection.
- You created a System asset in which you want to add the Google Dataplex assets, for example BigQuery.
- You have a resource role with the Configure external system resource permission, for example, Owner.
- You have a global role with the Catalog global permission, for example, Catalog Author.
- You have a global role with the View Edge connections and capabilities global permission, for example, Edge integration engineer.
- Ensure that your environment uses the latest user interface.
In your GCP environment
- You have enabled the Cloud Resource Manager API in GCP. This allows the Dataplex Universal Catalog integration to determine the Project IDs that the service account has access to and integrate metadata from those projects. This is done when the Project IDs are not specified in the integration configuration.
Steps
-
On the main toolbar, click
 →
→
 Catalog.
The Catalog homepage opens. -
On the main toolbar, click
 .
.
The Create dialog box appears. - In the Register with Edge section of the Create dialog box, click Integration Configuration.
The Integration Configuration tab page opens. - In the Connection Name column, locate the GCP connection that you used when you added the Dataplex Universal Catalog capability and click the capability link in the Capabilities column.
The Dataplex Universal Catalog capability configuration page opens. - In the Synchronization Configuration section, click the Edit icon.
- In Ingestion Type, select Dataplex Universal Catalog ingestion.
This integrates the Dataplex Universal Catalog Entries and Aspects.
If you want to integrate the metadata from projects, lakes, zones, tables, and columns, go to Dataplex ingestion. - Complete the fields as follows:
Field Action Required System In System, select the System asset in which you want to add the Dataplex Universal Catalog assets.
 Yes
YesUpdated: <timestamp> Click Updated: <timestamp> next to Synchronization Configuration, where timestampindicates the last time when the data was loaded from Google Dataplex.
The Project IDs are loaded to the dropdown list of the Project Id field. This can take some time. No
No
Project ID To add a Project ID where Dataplex is enabled, click Add Project Id. You can add multiple Project IDs. The capability will search in these projects.
The following rules apply when you add Project IDs:- If you do not add Project IDs here but entered a value in the Project IDs (Deprecated) field in the Dataplex capability, the capability will search in the projects that you entered in the capability.
- If you do not add Project IDs here and left the Project IDs (Deprecated) field empty in the Dataplex capability, the capability will search in the projects that you entered in the Service Account / Workload Identity Federation (WIF) field in the GCP connection. This applies only when the connection type is set to Service Account.
- Do not add Project IDs here and also enter a value in the Project IDs (Deprecated) field in the Dataplex capability. This will cause the synchronization to end with an error.
No
Dataplex location Select the Dataplex locations you want to integrate.
- If you select locations, the integration ingests Dataplex assets only from the specified locations. This is the recommended method.
- If the location is added in Dataplex but is not visible in the list, you can use this field to add the location for integration. Type the name of the location and press Enter.
- If you do not select any locations, the integration will search all locations where Dataplex assets are available. This can potentially cause increased synchronization times and permission errors.
The Dataplex Universal Catalog integration allows for both single-region and multi-region locations. For more information, go to Dataplex locations in Google Cloud documentation.
No
Domain Include Mappings In Domain Include Mappings, specify the entries in Dataplex Universal Catalog that you want to integrate and the Collibra domains where they need to be added. This is how it works:
- If no include mappings are defined, we ingest all assets into the same domain as the System asset.
- If there is no explicit domain mapping for a schema, we use the domain specified for the database.
- A match with a database has priority over a match with a schema.
To limit the scope of metadata ingestion to specific domains in Collibra, add a domain include mapping:
- Click Add Domain Include Mappings.
- In Path, add the path to the entries in Dataplex Universal Catalog for which you want to integrate the metadata.Tip
Use the following pattern: project name > location name > entryGroup name > parentEntry name > childEntry name. In the context of BigQuery, the parentEntry would be a BigQuery dataset name and childEntry would be a BigQuery table name.
You can use the question mark (?) and asterisk (*) wildcards. To include all entries within a defined scope, use the asterisk (*) wildcard to account for a string of characters. To define a more granular scope, use the question mark (?) wildcard to account for single-character variations.
If an entry matches multiple lines, the most detailed match is taken into account.ExampleIf you use the following syntax, for example,
projectA > europe-west1 > @bigquery, the integration ingests all parentEntry and childEntry objects within the BigQuery entryGroup of your ProjectA project in Dataplex Universal Catalog, limited to the europe-west1 location.If you want to use wildcards:
project? > europe-west1 > @bigqueryreturns entries from projects with a single-character variation in the project name, such as ProjectA, ProjectB, and so on.projectB > * > @bigqueryreturns entries from all BigQuery datasets within ProjectB and across all locations.- Other examples:
* > * > * > datasetX > tableYprojectA > europe-west1 > * > datasetA
- In Domain, select the Collibra domain in which you want to integrate the metadata.
No
Domain Exclude Mappings Optionally, in Domain Exclude Mappings, specify the path to entries in Dataplex Universal Catalog that you don't want to integrate.
Note The exclude mapping has priority over the include mapping.
To exclude specific metadata from being ingested into Collibra, add a domain exclude mapping:
- Click Add Domain Exclude Mappings.
- In the field, add the path to entries that you want to exclude.
Tip You can use the question mark (
?) and asterisk (*) wildcards. To exclude all entries within a defined scope, use the asterisk (*) wildcard to account for a string of characters. To limit the scope to a more granular filter, use the question mark (?) wildcard to account for single-character variations.Example If you want to use wildcards:projectA > * > @bigqueryexcludes all BigQuery datasets within ProjectA and across all locations.projectA > europe-west4 > dataset_v?, this exclusion applies at a more granular level. It limits the ingestion to datasets with a single-character variation within projectA and to the europe-west4 location only.
No
Columns ingestion mode In Columns ingestion mode, define how the ingestion must handle nested fields. The available options are:
- Ingest only parent columns:
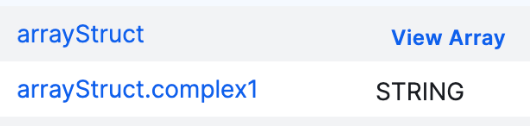
If you select this option, only the highest level fields are ingested as assets in Collibra. The hierarchy is shown via the View Array and View Struct links in the Technical Data Type column of these assets. - Ingest parent and nested columns:
If you select this option, Columns assets will be created for all fields. The parent assets also show the hierarchy via the View Array and View Struct links in the Technical Data Type column of these assets. - Flatten columns structure:
If you select this option, only the lowest level fields are ingested as assets.
YesAspect Mappings Aspects in Google Dataplex that refer to columns are integrated as Column assets in Collibra during a Dataplex Universal Catalog integration. Optionally, in this field, you can specify additional aspects in Google Dataplex that you want to integrate.
Aspect mapping is supported for Schema, Table, Database View, and Column assets, including partition columns. To map an aspect, enter the Google Dataplex aspect in Aspect field and the corresponding Collibra attribute in the Attribute field.
ImportantIf you use this feature, make sure to add all required characteristics to the asset type assignments. Also note that any entries with spaces in the aspect name are skipped.
To add an aspect mapping:
- Click Add Another Mapping.
- In Aspect Field, add the reference to the aspect field you want to integrate.
Use the following pattern:location.aspect-type-id>fieldPath. Whereaspect-type-idis a case-sensitive aspect type ID, andfield-pathis a case-sensitive JSON path to the particular field of the aspect.
For example:
europe-west4.custom-aspect>name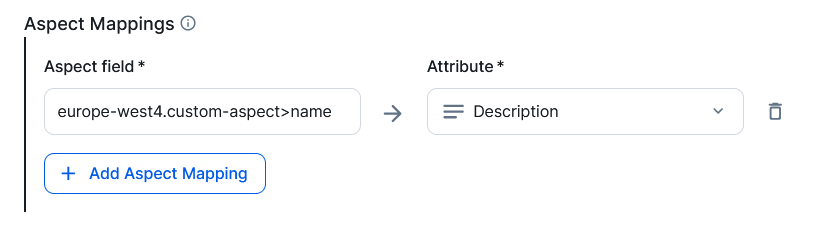
- In Attribute, select the attribute in which you want to see the value.
Show an example of partition column mappingIf you have a table in Google Dataplex that is partitioned by date, you can create a custom attribute named Partition interval and specify
bigquery-table > partitioning.interval→Partition intervalas shown in the following image. After synchronization, the partition interval values such asDay,Hour, and so on are added to the Partition interval attribute of the corresponding Column asset in Collibra.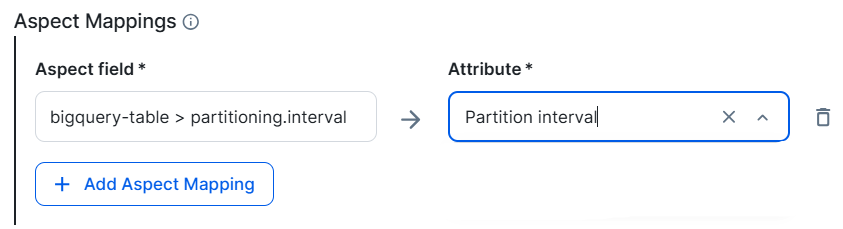 Note If an aspect is removed in Dataplex, the corresponding attribute in Data Catalog is removed after synchronization only when the asset’s max cardinality is set to one. If the maximum cardinality is greater than one, the attribute is not removed. No
- Click Save.
- Click Synchronize.
A notification indicates that the synchronization has started.


-
On the main toolbar, click
→
Catalog.
The Catalog homepage opens. -
On the main toolbar, click .
The Create dialog box appears. - In the Register with Edge section of the Create dialog box, click Integration Configuration.
The Integration Configuration tab page opens. - In the Connection Name column, locate the GCP connection that you used when you added the Dataplex capability and click the capability link in the Capabilities column.
The Dataplex capability configuration page opens. - In the Synchronization Configuration section, click the Edit icon.
- Complete the fields as follows:
Field Action Required System In System, select the System asset in which you want to add the Dataplex Universal Catalog assets.
YesUpdated: <timestamp> Click Updated: <timestamp> next to Synchronization Configuration, where timestampindicates the last time when the data was loaded from Google Dataplex.
The Project IDs are loaded to the dropdown list of the Project Id field. This can take some time. No
Project ID To add a Project ID where Dataplex is enabled, click Add Project Id. You can add multiple Project IDs. The capability will search in these projects.
The following rules apply when you add Project IDs:- If you do not add Project IDs here but entered a value in the Project IDs (Deprecated) field in the Dataplex capability, the capability will search in the projects that you entered in the capability.
- If you do not add Project IDs here and left the Project IDs (Deprecated) field empty in the Dataplex capability, the capability will search in the projects that you entered in the Service Account / Workload Identity Federation (WIF) field in the GCP connection. This applies only when the connection type is set to Service Account.
- Do not add Project IDs here and also enter a value in the Project IDs (Deprecated) field in the Dataplex capability. This will cause the synchronization to end with an error.
No
Dataplex location Select the Dataplex locations you want to integrate.
- If you select locations, the integration ingests Dataplex assets only from the specified locations. This is the recommended method.
- If the location is added in Dataplex but is not visible in the list, you can use this field to add the location for integration. Type the name of the location and press Enter.
- If you do not select any locations, the integration will search all locations where Dataplex assets are available. This can potentially cause increased synchronization times and permission errors.
The Dataplex Universal Catalog integration allows for both single-region and multi-region locations. For more information, go to Dataplex locations in Google Cloud documentation.
No
Domain Include Mappings In Domain Include Mappings, specify the entries in Dataplex Universal Catalog that you want to integrate and the Collibra domains where they need to be added. This is how it works:
- If no include mappings are defined, we ingest all assets into the same domain as the System asset.
- If there is no explicit domain mapping for a schema, we use the domain specified for the database.
- A match with a database has priority over a match with a schema.
To limit the scope of metadata ingestion to specific domains in Collibra, add a domain include mapping:
- Click Add Domain Include Mappings.
- In Path, add the path to the entries in Dataplex Universal Catalog for which you want to integrate the metadata.Tip
Use the following pattern: project name > location name > entryGroup name > parentEntry name > childEntry name. In the context of BigQuery, the parentEntry would be a BigQuery dataset name and childEntry would be a BigQuery table name.
You can use the question mark (?) and asterisk (*) wildcards. To include all entries within a defined scope, use the asterisk (*) wildcard to account for a string of characters. To define a more granular scope, use the question mark (?) wildcard to account for single-character variations.
If an entry matches multiple lines, the most detailed match is taken into account.ExampleIf you use the following syntax, for example,
projectA > europe-west1 > @bigquery, the integration ingests all parentEntry and childEntry objects within the BigQuery entryGroup of your ProjectA project in Dataplex Universal Catalog, limited to the europe-west1 location.If you want to use wildcards:
project? > europe-west1 > @bigqueryreturns entries from projects with a single-character variation in the project name, such as ProjectA, ProjectB, and so on.projectB > * > @bigqueryreturns entries from all BigQuery datasets within ProjectB and across all locations.- Other examples:
* > * > * > datasetX > tableYprojectA > europe-west1 > * > datasetA
- In Domain, select the Collibra domain in which you want to integrate the metadata.
No
Domain Exclude Mappings Optionally, in Domain Exclude Mappings, specify the path to entries in Dataplex Universal Catalog that you don't want to integrate.
Note The exclude mapping has priority over the include mapping.
To exclude specific metadata from being ingested into Collibra, add a domain exclude mapping:
- Click Add Domain Exclude Mappings.
- In the field, add the path to entries that you want to exclude.
Tip You can use the question mark (
?) and asterisk (*) wildcards. To exclude all entries within a defined scope, use the asterisk (*) wildcard to account for a string of characters. To limit the scope to a more granular filter, use the question mark (?) wildcard to account for single-character variations.Example If you want to use wildcards:projectA > * > @bigqueryexcludes all BigQuery datasets within ProjectA and across all locations.projectA > europe-west4 > dataset_v?, this exclusion applies at a more granular level. It limits the ingestion to datasets with a single-character variation within projectA and to the europe-west4 location only.
No
Columns ingestion mode In Columns ingestion mode, define how the ingestion must handle nested fields. The available options are:
- Ingest only parent columns:
If you select this option, only the highest level fields are ingested as assets in Collibra. The hierarchy is shown via the View Array and View Struct links in the Technical Data Type column of these assets. - Ingest parent and nested columns:
If you select this option, Columns assets will be created for all fields. The parent assets also show the hierarchy via the View Array and View Struct links in the Technical Data Type column of these assets. - Flatten columns structure:
If you select this option, only the lowest level fields are ingested as assets.
YesAspect Mappings Aspects in Google Dataplex that refer to columns are integrated as Column assets in Collibra during a Dataplex Universal Catalog integration. Optionally, in this field, you can specify additional aspects in Google Dataplex that you want to integrate.
Aspect mapping is supported for Schema, Table, Database View, and Column assets, including partition columns. To map an aspect, enter the Google Dataplex aspect in Aspect field and the corresponding Collibra attribute in the Attribute field.
ImportantIf you use this feature, make sure to add all required characteristics to the asset type assignments. Also note that any entries with spaces in the aspect name are skipped.
To add an aspect mapping:
- Click Add Another Mapping.
- In Aspect Field, add the reference to the aspect field you want to integrate.
Use the following pattern:location.aspect-type-id>fieldPath. Whereaspect-type-idis a case-sensitive aspect type ID, andfield-pathis a case-sensitive JSON path to the particular field of the aspect.
For example:
europe-west4.custom-aspect>name - In Attribute, select the attribute in which you want to see the value.
Show an example of partition column mappingIf you have a table in Google Dataplex that is partitioned by date, you can create a custom attribute named Partition interval and specify
bigquery-table > partitioning.interval→Partition intervalas shown in the following image. After synchronization, the partition interval values such asDay,Hour, and so on are added to the Partition interval attribute of the corresponding Column asset in Collibra.Note If an aspect is removed in Dataplex, the corresponding attribute in Data Catalog is removed after synchronization only when the asset’s max cardinality is set to one. If the maximum cardinality is greater than one, the attribute is not removed. No
- Click Save.
- Click the Add synchronization schedule icon.
- Enter the required information and click Save:
Field Description Repeat The interval when you want to synchronize automatically. The possible values are: Daily, Weekly, Monthly, and Cron expression. CronThe Quartz Cron expression that determines when the synchronization takes place.
This field is only visible if you select
Cron expressionin the Repeat field.EveryThe day on which you want to synchronize, for example, Sunday.
This field is only visible if you select
Weeklyin the Repeat field.Every firstThe day of the month on which you want to synchronize, for example, Tuesday.
This field is only visible if you select
Monthlyin the Repeat field.At
The time at which you want to synchronize automatically, for example, 14:00.
- You can only schedule on the hour. For example, you can add a synchronization schedule at 8:00, but not at 8:45.
- This field is only visible if you select
Daily,Weekly, orMonthlyin the Repeat field.
Time zone The time zone for the schedule.
The synchronization job synchronizes the Google Dataplex data.
After the synchronization:
- You can view a summary of the results from the Activities list.
- For information on the integrated data, go to Synchronized data via Google Dataplex Universal Catalog integration.
- You can set up and configure data profiling and configure the profiling options and profile the data,
- You can enable and set up Unified Data Classification and automatically classify the data.
- You can set up and configure the use of sample data and request sample data.