Important
Choose an option below to explore the documentation for the latest user interface (UI) or the classic UI.
The template editor allows you to copy the Collibra assessment templates or create your own templates.


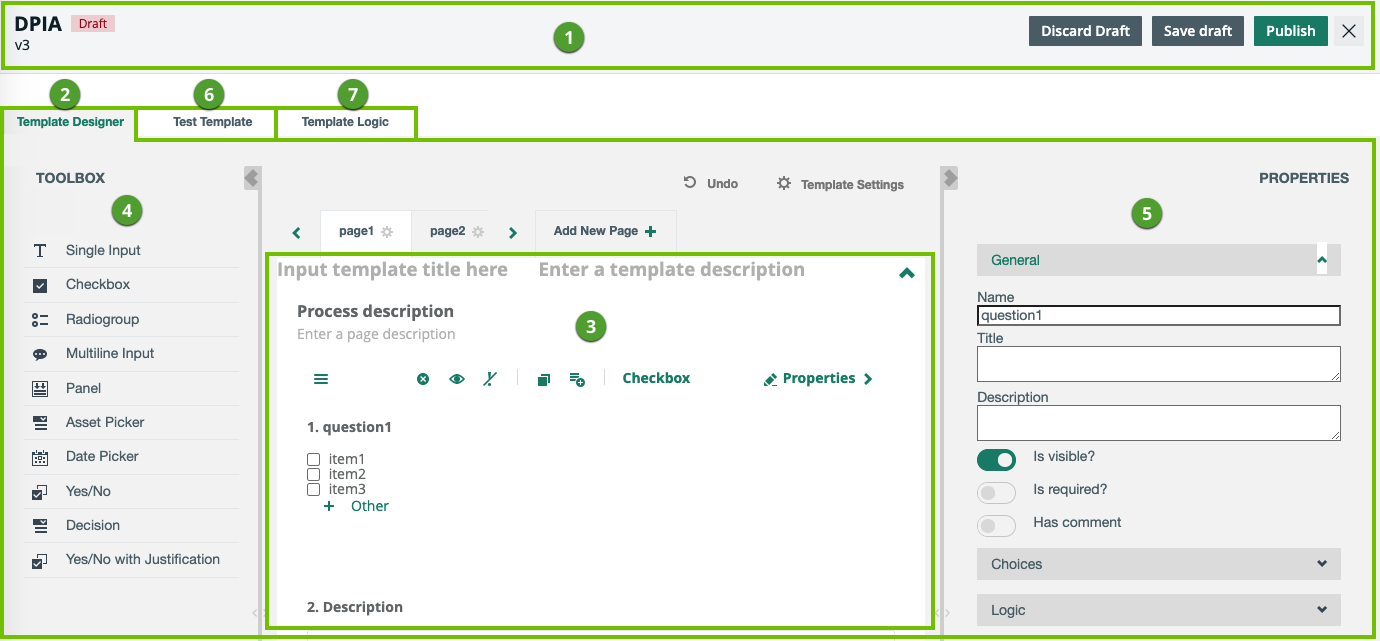
The following table describes what is shown on the template editor.
| No. | Section/Tab | Description |
|---|---|---|
| Action bar |
|
|
|
2 |
Template Designer |
|
|
3 |
Canvas
|
Body where you can add pages and fields and work with them. |
| 4 | Different types of fields that you can add to the canvas. | |
| 5 | Context-specific settings, which are based on the page or field that you have currently selected on the canvas. | |
|
6 |
Test Template | A preview of your template. You can enter responses to test, for example, how the configured logic will work when conducting an assessment. |
|
7 |
Template Logic | Logic conditions configured in the template. You can add, edit, and delete logic conditions. |
| No. | Description |
|---|---|
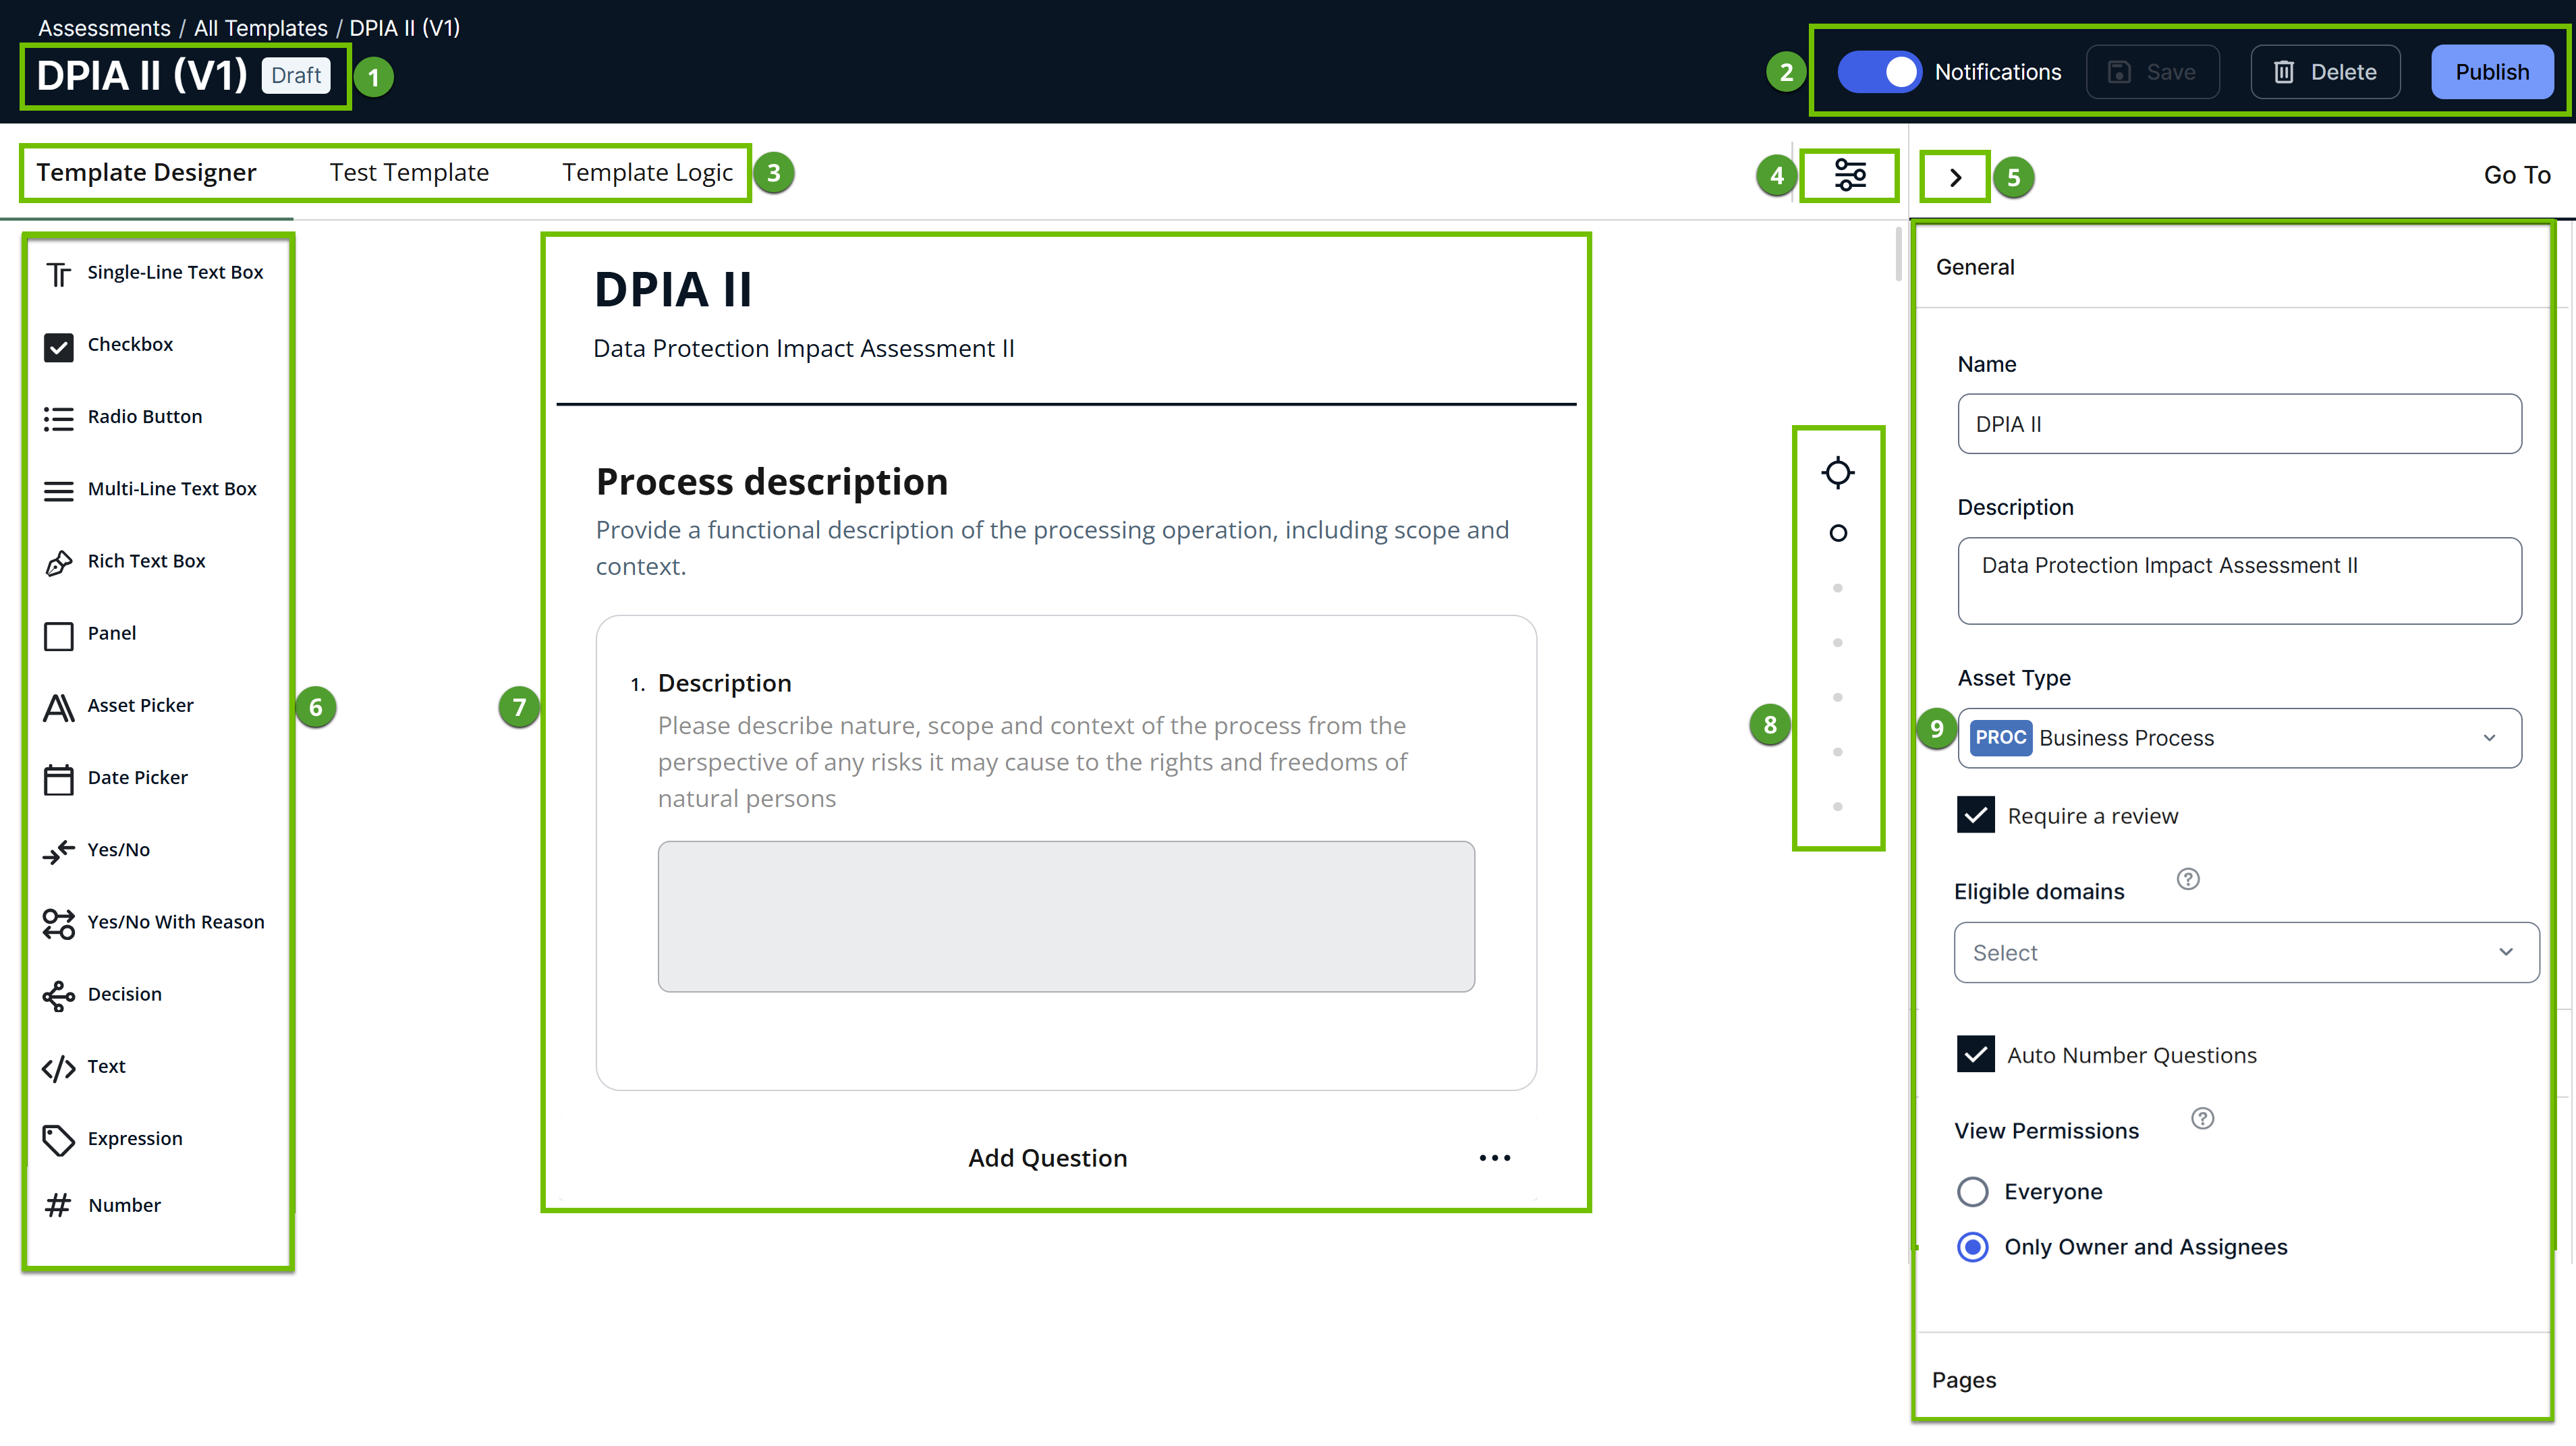
| 1 | Name, version number, and status (Draft or Published) of the template. |
| 2 | Action bar, which contains buttons to manage the template. |
| 3 |
|
| 4 | Icon to open the general settings of the template, such as name, description, and the target asset type to be assessed. |
| 5 | Icon to hide the sidebar. |
| 6 | Toolbox, which contains different types of fields to add to the canvas. |
| 7 | Canvas where you can add pages and fields and work with them. |
| 8 | Icons to navigate to specific pages in the template. |
| 9 | Context-specific template settings, which are based on the page or field that you have currently selected on the canvas. |